
In a Salesforce implementation project, often old systems are replaced. However, the data from a legacy application that is to be replaced by Salesforce must typically be preserved. Consequently, you will need to migrate this data to your new Salesforce environment. Fortunately, this can be accomplished by uploading CSV files.
While there is a Data Import Wizard avai;able within the Salesforce setup, I won't delve into that within this blog. For large-scale data imports of this nature, I recommend employing Data Loader. This is an application that you download to your computer, enabling you to export, insert, update, upsert (a combination of inserting and updating), and even delete data from and to youir org.
In one of my previous blogs I have already discussed the use of Data Loader. Also on Trailhead and Youtube you can find plenty of useful tutorials on Data loader. If you are tasked with overseeing such a data import, it is essential to immerse yourself in the process.
In addition to being well-versed in the capabilities of Data Loader and how to wield this tool, it is imperative to grasp the data model of your Salesforce environment. By data model, I mean understanding which objects (such as Opportunity or Contact) are interlinked with records from other objects (like Account). Knowing, for instance, that an Opportunity references an Account, you will naturally understand that importing Accounts should proceed importing Opportunities and Contacts associated with those Accounts.
In this article, I'll be sharing some tips that you might not easily come across on the internet, but they definitely hold significant value.
Excel functions and formulas you should know
When preparing your file, you'll make use of various Excel formulas to validate and clean up your data.
VLOOKUP
Your source data may not always be structured in precisely the same tables as where they need to ultimately reside in Salesforce. Often, a source database is somewhat flatter. For example, a Service Ticket may encompass all customer data, but in Salesforce, you maintain this information in one central location (Account). Consequently, an original table can sometimes lead to the importation of multiple tables, and the relationships between records in various tables are often significant. In this context, utilizing vertical lookup functions proves to be highly valuable when establishing these relationships.
Here's a tip for determining the range within which you're searching: select entire columns instead of a specific range. This helps prevent a potential issue where your function, on the fifth row, isn't searching within the top four rows of your source table but rather the first four |(empty) rows beneath the last row that you are actually intending to search in.
=VLOOKUP(A2;Sheet1!A:B;2;0)instead of =VLOOKUP(A2;Sheet1!A1:B999;2;0)
SUBSTITUTE
Text fields in your source data may contain special characters that can cause issues in your import file. Characters such as commas, semicolons, and tabs can be mistakenly interpreted as the start of a new column in the CSV file.
Double quotation marks, when occurring in pairs, ensure that any commas and semicolons between them are not treated as delimiters. However, if the quotation marks within a cell are not balanced, it can result in the unintended omission of delimiters, thereby disrupting the column count for that row.
Quotation marks could also be used as symbols for inches or seconds, so always verify their presence. To be absolutely certain, you can apply a series of nested SUBSTITUTE functions. Characters that I personally prefer to remove include:
- Line Breaks, referenced bij CHAR(12) in a SUBSTITUTE function
- Comma's, CHAR(44)
- Semicolons, CHAR(59)
- Indents (Tab key), CHAR(11)
- Double quotes, CHAR(34)
In an ASCII table, which you can find anywhere on the internet, you can look up the codes for every imaginable character.
LEFT
In Salesforce, text and number fields have maximum character limits. Generally, record names are limited to a maximum of 80 characters. Many "simple" text fields can contain up to 255 characters, but custom fields may have different limits. Ensure to check the fields where data will be stored for their maximum length and use a LEFT formula to ensure you do not exceed the character limit.
Together with the SUBSTITUTE functions as mentioned above, you could stack this to build the following:
=LINKS(
    SUBTITUEREN(
        SUBTITUEREN(
            SUBTITUEREN(
                SUBTITUEREN(
                    SUBTITUEREN(
                        Blad1!C2,
                        TEKEN(12),
                        ""
                    ),
                    TEKEN(44),
                    ""
                ),
                TEKEN(59),
                ""
            ),
            TEKEN(11),
            ""
        ),
        TEKEN(34),
        ""
    ),
    254
)
The "Sheet1!C2" in the formula above can also be replaced with a vertical lookup function, providing added assurance that data from different rows won't be inadvertently combined as a result of a minor formula error.
The formatting with line breaks and tabs, as seen above, is more readable, but Excel may encounter issues with it. It's better to use the function without spaces, tabs, and line breaks.
=LEFT(SUBSTITUTE(SUBSTITUTE(SUBSTITUTE(SUBSTITUTE(SUBSTITUTE(Sheet1!C2,CHAR(12),""),CHAR(44),""),CHAR(59),""),CHAR(11),""),CHAR(34),""),254)Date format
Equally important is the format in which you import a date or datetime value. Be aware that the API value of a date or datetime is always expressed in GMT. If your source data contains dates and/or times expressed in a different time zone, make the necessary adjustments to the value you're importing. Consider the time zone differences, especially when there are variations in daylight saving time within the data's time zone.
You can also use Excel to determine whether the date or datetime that needs correction falls in daylight saving time or standard time. Test this correction in advance with a small batch of records to ensure it has been made correctly. If you have configured the time zone of your user correctly, you should see the correct time expressed in your time zone, while you imported the date or time in GMT.
Suppose I want to import 1 November 2023 at 8:00 AM Amsterdam time. In that case, I would place the following value in my CSV file: 2023-11-01T07:00:00Z. When I subsequently view the date in Salesforce, I'll see 1 November 2023 at 8:00 AM in the user interface. However, someone in London looking at the same record will see a time of 7:00 AM. This demonstrates how Salesforce automatically adjusts the time display based on the user's time zone setting.
Above you also see a correct format for writing date-time values for your import file. Here you can find correct date and time formats you can use for data imports.
Daylight Saving Time correction in excel
For this example, let's assume the date to be converted is in Sheet1!D2.
To keep things organized, it's best to perform each step of the calculation in separate columns. I typically add a few columns to the Excel sheet where the source data that needs transformation. is located.
First day of Daylight Saving Time (timezome Amsterdam/Europe)
(cell E2 in our example)
=DATE(YEAR(D2),3,24)+8-WEEKDAY(DATE(YEAR(D2),3,24))Last day of Daylight Saving Time (timezome Amsterdam/Europe)
(cell F2 in our example)
=DATE(YEAR(D2),10,24)+8-WEEKDAY(DATE(YEAR(D2),10,24))Is the date in Sheet1!D2 in Daylight Saving Time?
(cell G2 in our example)
In this example, the formula that displays the start date of daylight saving time is in cell E2, and the formula that shows the end date of daylight saving time is in cell F2.
=EN(D2<F2;D2>E2)Result when the date in D2 is during Daylight Saving Time: TRUE
Result when the date in D2 is not during Daylight Saving Time: FALSE
Adjust the time to GMT
(cell H2 in our example)
=D2-IF(G2;2;1)/24In this formula, you subtract 2 hours in the case of daylight saving time (Amsterdam time zone) and 1 hour in the case of standard time. So, when it's 8:00 AM in the Netherlands on November 1, 2023, it's simultaneously 7:00 AM in the United Kingdom.
Convert corrected date-time to the correct format for import
(cell I2 in our example)
=TEXT(H2,"YYYY-MM-DD")&"T"&TEXT(H2,"hh:mm")&":00Z"External Id
At the beginning of the article, I explained that you would often need to import relationships. Naturally, you start by delving into the data model and importing records that are highest in the relationship hierarchy. Cases and Opportunities have references to Accounts, so you should import those Accounts first.
Creating relationships is most straightforward when you assign unique IDs to all the records you import. With vertical lookup functions, you can link the correct Parent ID (the unique code of the parent record) to your child records. For instance, Opportunity 500 and 543 could both be associated with Account 209. If you provide your own unique IDs in your upload, you can easily match the relationship of a child record to an Account in a later import, without the need to look up the Salesforce record ID of that Account first.
However, do ensure beforehand if there is a field marked as an External ID. If it doesn't exist or there is only one and it is being used for another purpose, create a new external ID field and use it for your purpose.
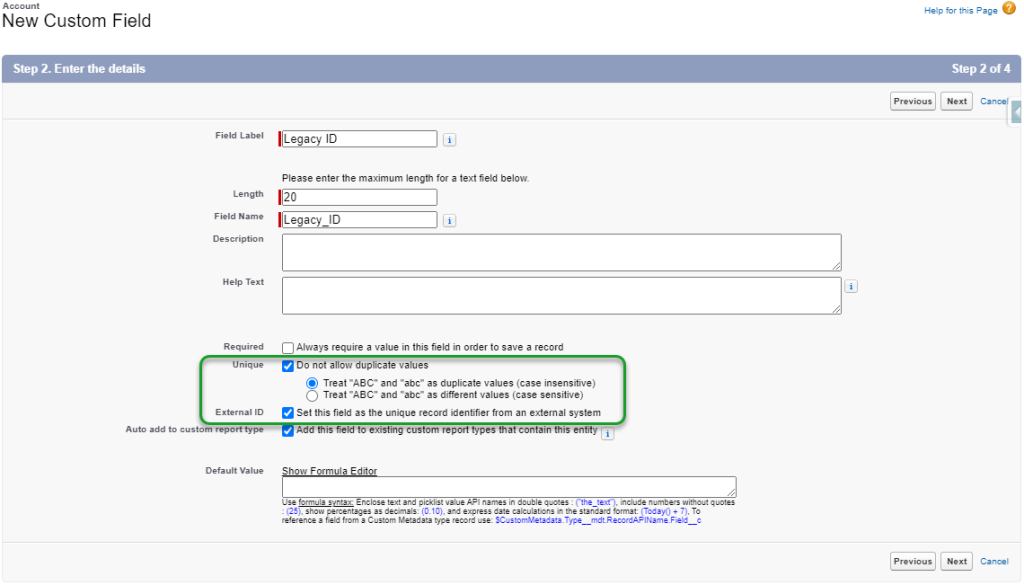
By importing using the upsert function, you can establish the relationship with the parent record using the external ID you've already set up in your Excel file.
In your excel file it looks like this

In Data Loader, you first select "Upsert."
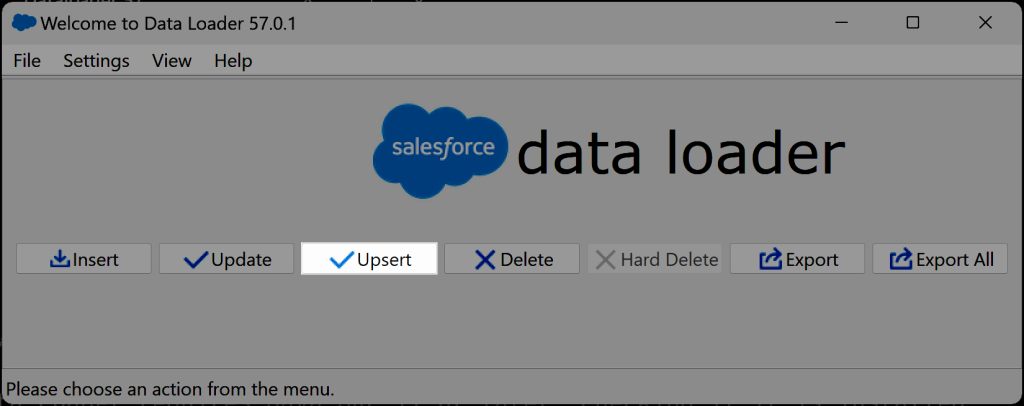
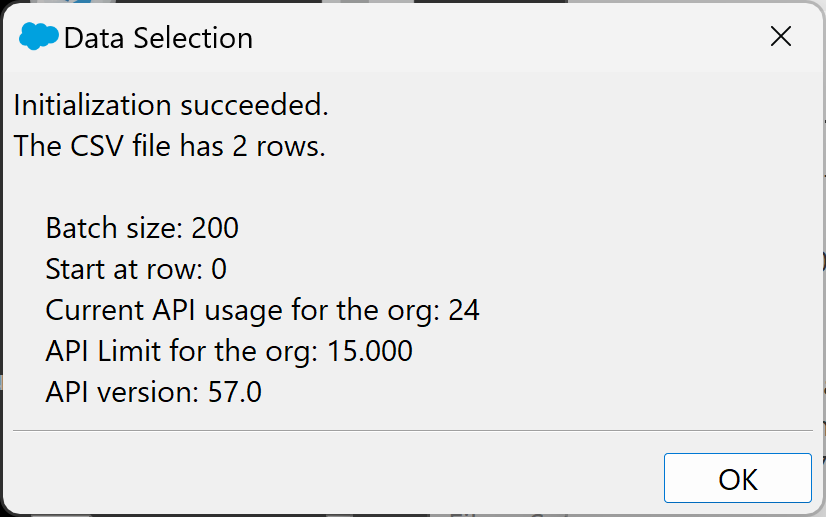
Selecting the object you want to import and the CSV file to be used is the same as in any import process.
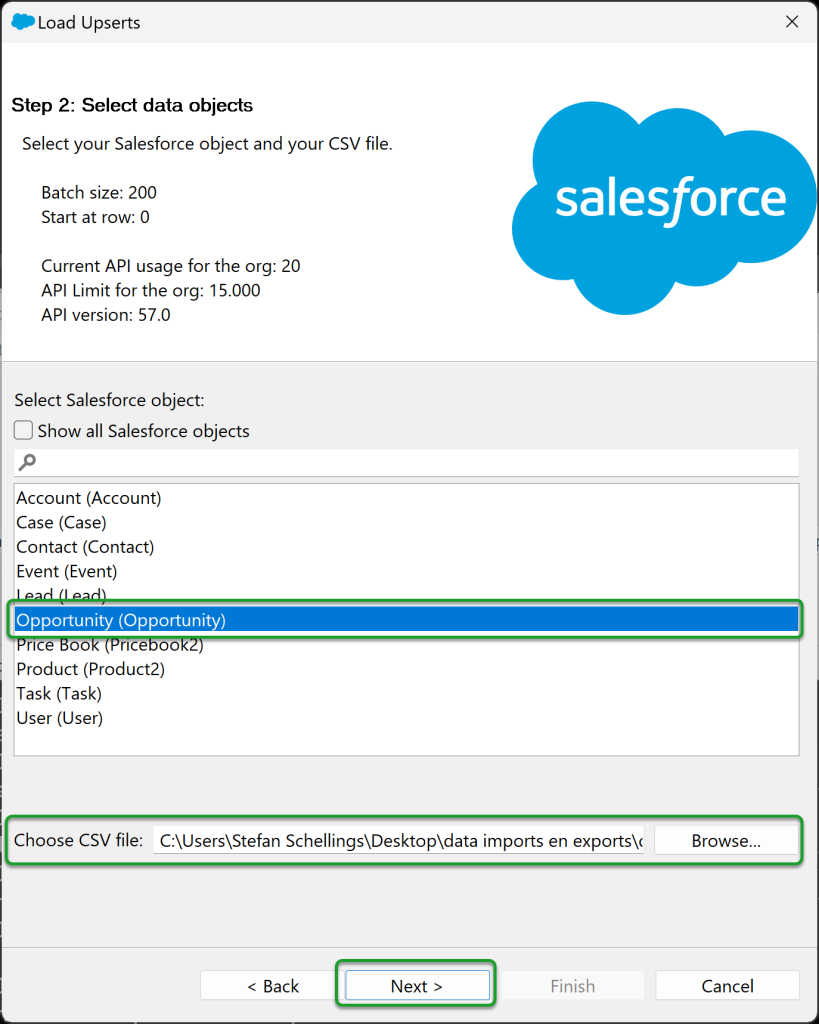
Since an upsert can also update existing Opportunities, you need to specify to Dataloader the unique key you'll use to associate data with existing Opportunities. In this example, I'm using the ID from the old system, which we store in Salesforce in the Legacy_ID__c field.
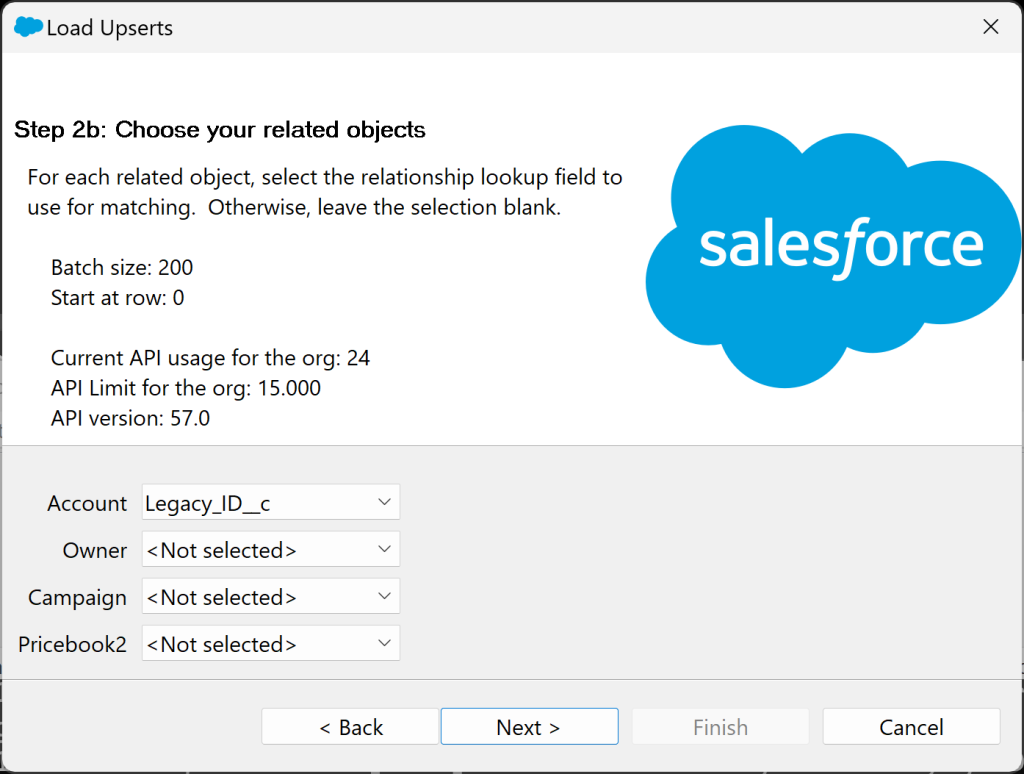
For all relationships to parent objects of the Opportunity Object, you can do that in the next screen as well. Linking to a parent Account is what I want to do based on the Legacy ID of the Account.
When mapping the fields, you can do this in the following manner:

Extra benefit of External ID's
An additional advantage of a unique external ID is that it allows you to more easily locate failed import records to resolve data issues. You can include those records in a new CSV file for a second attempt to import these lines.
Because you can directly match the successfully imported records with the lines in your source file, you can confidently identify which lines do not need to be included in the second file.
Smaller batches
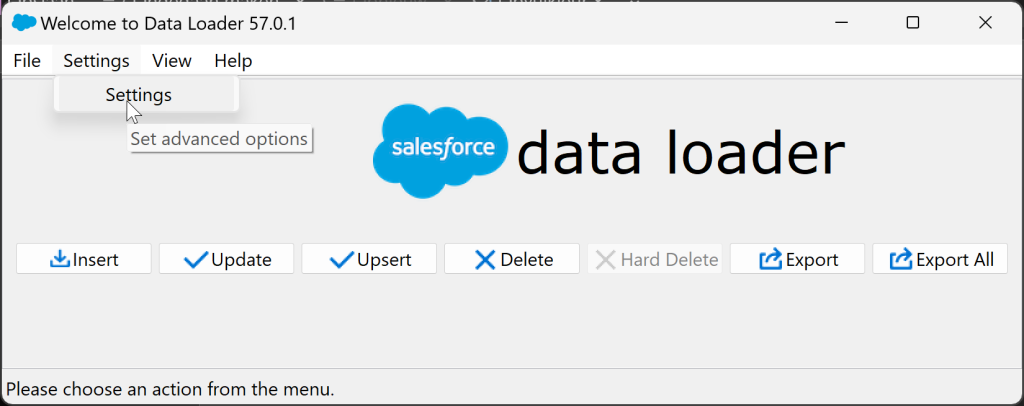
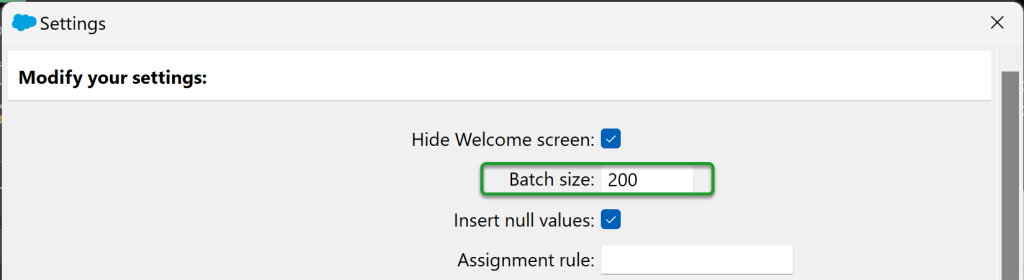
If you know that there are many triggers in your Salesforce Org that respond to the creation or update of records from the object you're importing, opt for a smaller batch size to prevent potential bottlenecks. By default, Data Loader imports batches of 200 records at a time.
In the Settings menu, you can adjust the batch size to be smaller. While this may result in a longer import process, it reduces the risk of timeouts in these automated processes.